Adding appointment information for clients
Tell clients what they need to know before they arrive: parking, which door to use, what to bring or how to prepare.
How to set it up
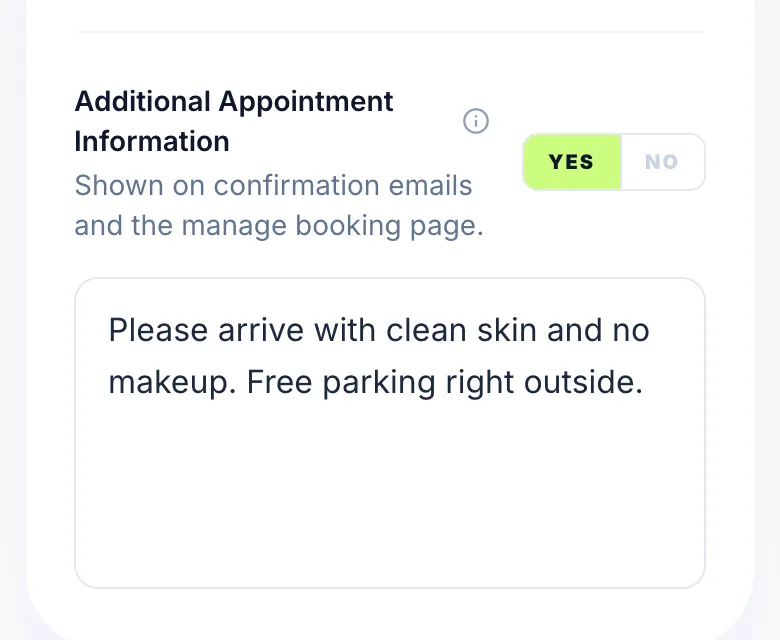
Go to Settings → My Booking Link and scroll to Additional Appointment Information. Turn it on and type your message.
What to include
- Parking: where to park, where not to, time limits
- Directions: which entrance, landmarks, what to do if the map drops them on the wrong street
- Gate or door codes and intercom instructions
- What to wear, for example loose clothing for a spray tan
- What not to do beforehand, for example no moisturiser before waxing
- Arrival: wait outside, ring the bell, or come straight in
- What to bring, for example flip flops or a reference photo
Where clients see it
It appears under 'Important Information' in the client's booking confirmation email and on their manage-booking page, which they can open from their confirmation at any time. It isn't shown on your booking page before they book. Manual bookings get it too when you send the client their confirmation.
Changing or turning it off
The manage-booking page always shows your latest wording. Confirmation emails already sent don't change. If you turn it off, your message is kept, so you can turn it back on later.
Tip
Keep it to a few short sentences or points. Short messages get read in full.
Version 1.0 · Updated 17 Nov 2026
Was this helpful?
More in Getting Started
See all- Announcement banner on your booking pageShow a message at the top of your booking page: holiday closures, Christmas availability, new treatments or offers.
- Stripe — accepting deposits and paymentsGlamly uses Stripe to take card payments: deposits, full payments, payment links, gift voucher sales and Tap to Pay.
- Things to check after onboardingOnboarding covers the essentials, but these are worth checking before you share your booking link.
- Working from multiple locationsIf you work from more than one salon or studio on different days — renting a chair at a second salon, splitting time between two addresses, or anything similar — Glamly's multiple locations feature lets you assign a different address to each working day.
Still stuck?
Message us and a real person will get back to you. If you're logged in, Settings → Contact Us is quickest.
Not on Glamly yet?
Bookings, deposits, reminders and payments in one app for beauty pros. Try it free for 30 days — no card needed.